My blog for arts and crafts interests. On this site I will be including my favorite project ideas, craft obsessions, kawaii finds, art supply reviews, craft materials, supply stores/outlets, interviews of artists and crafts people, thrift shopping finds, my projects and completed works, and more! I'm a mobile blogger ^.^
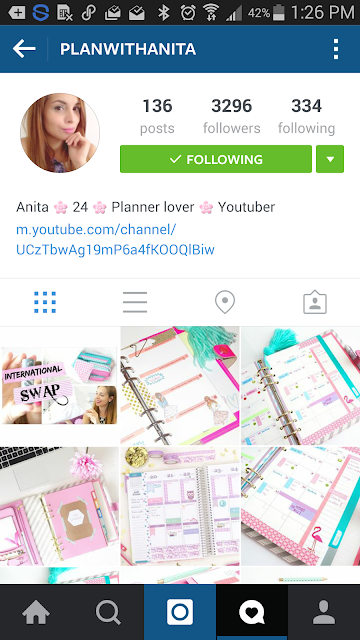
I was perusing Instagram today, basking in the beauty and awesomeness that the accounts that I follow share. I felt so much admiration for these ladies that I follow that I thought I would share them with you. Keep in mind that this post is dedicated to my fellow planner addicts only. I also follow many many amazing needle felters, jewelers, photographers, makeup artists, and more.
These ladies are seriously super cool.
Let me know what you think! Also, please feel free to share your favorite Instagram #planneraddicts in my comments.
I have been looking high and low (online) for some free daily planner pages that fit my needs and my Websters Pages planner. The pages for my little planner are 3.75" x 6.75" and all I can seem to find are the 1/2 letter size. That's ok because I'm going to use that size of planner next year...but what about this year!?!?
I was using this page, and it's really cute, but it just doesn't
have the components that I need - namely a larger notes section
I decided to just create my own using my My Memories Digital Scrapbooking program. I love this program because you can LITERALLY use it to design any kind of project from scrapbooking layouts to cards to Facebook cover photos to website banners to calendars to planner pages and more!
You can customize the size of your project to suit your needs. You can download lots and lots of free design kits from the MyMemories website, plus they have more design kits starting at only $0.99. These design kits include all sorts of fun photo realistic embellishments like ribbons, buttons, flowers, roses, etc. There are also numerous backgrounds, shapes, imprints, and word art.
So here is what I came up with:
(Right click to save the image to your computer)
I wanted a daily page that helped me keep track of how much water I was drinking, my mood, the weather, remember the funny things my daughter says, and have room to make a to do list and/or to write a blurb about how my day went. It also helps me stay on track with eating well, exercise, and taking my vitamins.
Here is another version of the page for those of you that want to
decorate the page yourselves with stickers and doodles
and what not.
(Right click to save the image to your computer)
This is a free Websters Pages daily planner page, and this also works with Filofax or KikiK.
Well, yesterday's party was wonderful! The ladies in my meetup group are just beautiful inside and out, and it was a pleasure teaching them how to make these cute little latte art needle felted pin cushions.
In honor of the mad tea party theme I wore a fascinator that I got at St James Tea Room
Here is a final photo of the tea party setup
I LOVE these blooming flower tea bombs.
I got them on Amazon and I need to see if there is a tea shop in town that sells them.
A tea party would not be complete without french macaroons. These are from L'Amour Baking Co.
A french bakery that just opened up a few weeks ago in the village and I must say - they are amazing!
Flavors are pistachio, lemon meringue, coconut, coffee, lavender, and neapolitan.
A little tip - if you go into their bakery and like them on Facebook while you're there, they will give you a free macaroon.
Dianne and Jenny looking all cute working on their projects
Luna's coffee before adding cream
Sherry decided to add a swirl of creme to her demitasse cup
Margarita working on filling in the creme heart
Dianne making us laugh while she worked
Barb's beautiful teacup and her cute pincushion!
Jenny chose a floral demitasse cup and saucer
Luna and her nephew working away
And in between the instruction I worked on this pin cushion. Still not done yet - I'm going to add felted roses and leaves.
I'm totally bummed that I didn't take photos of everyone with their completed pin cushions but we just got lost in conversation!
I have been eagerly waiting for this day to arrive and it's finally here! My Mad Tea Party and Needle Felting Class. The tea party is hosted by Vanessa Valencia at A Fanciful Twist. Be sure to visit her blog, as well as the blogs of the other tea party hosts.
I'm waiting awhile to prep completely for my tea party. I want the tea to be hot and the macaroons to be fresh! But don't worry - tomorrow I will post all of the photos of the tea party and needle felting class.
Meanwhile, I thought I would share my collection of tea/coffee/hot chocolate ware with you.
In my kitchen, above my cabinets, I have a nice space to display my sets.
I'm pretty much obsessed with Alice in Wonderland
Yup
Here is my Bavarian Hot Cocoa set that I inherited from my grandmother.
I picked up this coffee pot, tea pot, and creamer at various thrift shops
Here is another set that I inherited from my Grandmother. A biscuit jar, cup and saucer, creamer cup, and coffee pot. It's not all one set but they compliment each other nicely.
Perfect for spoiling yourself on a chilly morning.
It's chipped - like most things that are well loved - all the more reason to use it!
Love!
My mom bought this set for my birthday this year. We got it at an Antique Shop that is in an old school house in Arkansas. I fell in love with it when I saw it. It is hand painted and signed. The woman who did this did an excellent job!
My 2 of my handmade tiered party plates, and 1 vintage one. I'll be using the one on the left for my tea party so you'll see better photos of that one.
I picked these Bailey's Irish Coffee cups, sugar, and creamer up at Things Etc., an indoor flea market in Albuquerque. Got a screaming deal on these. I have 4 cups total plus the sugar and creamer. I was so excited that I was able to complete the set during one shopping trip! A couple of different vendors had all of the pieces that made up my set.
It was meant to be!
So cute!
Here is my party setup.
Upcycled tiered party plate - made by me!
I'll be serving the flowering green tea in a clear teapot. I have a nice tea cozy that I swapped for at a craft show. It works great! I highly recommend getting a tea cozy.
My creamer cup that I a fellow vendor at Antiques and Things gave me - not the same pattern as the tea set that I'm using but VERY close.
My cups and saucers. These also used to belong to my grandma.
The pattern is Haviland Apple Blossom
My craft studio - it has enough seating for 9 people.
The needle felting class kits.
I'll be showing my students the various needle felting tools and how to use them.
Plus show them how to craft on a budget.
Each student will get to choose a cup and saucer with which to make their pin cushion for the class.
(The swan one is mine)
And this is what we'll be making. Needle felted latte pin cushion.
Today I'd like to share my experience with making my own Alcohol Inks. I've used the Ranger Alcohol Inks in the past and I really like them a lot! They're permanent and they dry really fast, so they're great for adding color to shiny plastics and metals.
Search my blog's materials category to see how I used them to change the color of some metal charms.
Anyhoo, I got the idea to make my own Alcohol Inks from Alisa Burke - an artist and blogger that I just adore! <3 She wrote a post titled "Kids Markers - Tips and Tricks for Adults". In the article she says that you can make watercolors and alcohol inks out of dried out Crayola Markers! OMG that's right up my alley - and to think I've been throwing them away when my daughter leaves the cap off. Doh!
So, to make your own you will need a dried out marker, rubbing alcohol, and a container to put the ink in. Today I'm going to use an empty spray bottle, so I can spritz the ink out if I want.
For starters I peeled the label off my bottle.
Then I got some pliers to pull the end cap off of the marker.
I put the ink tube into my bottle.
And added the rubbing alcohol.
Nothing much happened right away so I got the idea to pull the marker tip off too!
After I added that in, the ink REALLY started to bleed out into the alcohol.
After a few moments it looked like this! Awesome! Keep in mind that Alisa says to leave them soaking overnight for the best results.
I was so pleased with the black ink that I decided to proceed with some hot pink.
I actually had to break the end cap off of the marker in order to get the ink tube out. I then used needle nose pliers to pluck out the remaining pieces of plastic and pull out the tube.
I put in the tube and marker tip and added in the rubbing alcohol. I only filled it about half way because the tube was shorter than the 1st one.
I had ink on my fingers from touching the black marker's tip and some of it bled onto the pink marker tip so, be sure to wash your hands in-between markers!
Here is what they looked like after a few minutes.
As I said, let soak overnight for the best results.
Hope you liked this post! Stay tuned because on Saturday, July 11th I'll be hosting a Mad Tea Party and Needle Felting Party. I will be sharing the photos of my event and I can't wait to see what you think!