Pages

Saturday, November 14, 2015

DIY: Mini Pennant Banner

Hello my pretties,

Today I want to share a fun little project with you - how to make a mini pennant banner using a Big Shot (or other die cutting machine), Spellbinders dies, and a sewing machine.

I am using Spellbinders Nested Shapeabilities Dies, Lacey Pennants  

with my London Market paper pack

I am using pieces of scrap paper from this pack, which works perfectly because the small dies are really little.  So cute!  You simply line the dies up, face down.

Put the paper and dies between the two pieces of plastic, on top of the cutting platform, and run them through your Big Shot machine.

Once I cut several little pennant pieces I took them over to my sewing machine.
My tension was set to auto and my stitch length was set to 3 on my Singer Esteem sewing machine. 

I pulled enough thread through so that I would have enough to use to tie my banner.  I then pushed the first piece of paper up against the presser foot, and lined the paper up using the right edge of the presser foot as the guide.

Grab the left side of the paper to hold it straight and just use the hand crank to run it through the machine.
Do not use the pedal!

Once the paper has cleared the presser foot completely then press another piece of paper against the presser foot and repeat the process.

This is my finished product.  
Perfect for using on a scrapbook page, to hang over a framed picture, to hang on a bookshelf, at the top of a mirror, etc. etc.  The decorating possibilities are endless.

I've used mine to decorate my miniatures shelf.

Hope you found this helpful!  I'll post a video as soon as I get another tripod.
Thanks for reading! <3
Myria


Friday, November 13, 2015

Things I Love: Cricut Machines on Sale


**This post contains affiliate links and I will be compensated if you make a purchase after clicking through my links. 

Hello Readers,

I love Cricut!  I am so lucky that my friend Mia recently gave me her Cricut machine and all of its accessories because she had to make room in her house for her new baby.  I've got to say that I would SO jump on this deal if I didn't already own one!


Do you want to be able to easily make pretty décor, personalized gifts, and fun cards for upcoming holidays? Then you need to treat yourself to a Cricut Explore Air™ — Cricut's very popular electronic cutting machine. It's the best DIY crafting tool to be developed since the sewing machine! 

The Cricut Explore Air is versatile, easy to use, and allows for very precise cuts. It's also incredibly affordable, especially since Cricut generously discounted the cost by up to $200 on the machine and bundles — just in time for the holiday crafting season! 

With the Cricut Explore Air™, you can cut over 60 different types of material, including paper, fabric, plastic and vinyl to name a few. The Explore Air also features Cut Smart™ technology, which allows you to cut a wide range of shapes and sizes with exceptional precision, from ¼" tall up to 11½" wide x 23½" tall. 

This Cricut Explore machine is called the Air because it has built-in Bluetooth® capability. This means you can use Cricut’s free iPad app and design anything you want from your iPad, just like you would on your home computer, but with the convenience of being able to take your projects with you anywhere. Then, you can just wirelessly send your project from your iPad to your Explore Air to bring it to life.

While the Cricut Explore Air is impressive on its own, purchasing it with one of Cricut's bundle offerings makes it even more valuable. Each bundle comes with different accessories that allow you to expand your creativity and make your crafting projects even more simple and fun to create. Plus, by purchasing your Explore Air with a bundle, you're able to save a bundle in the process! 

Here is what they are offering:


Go to Cricut.com and check out the savings Cricut is offering on their Cricut Explore Air™ and bundles today so you can get your very own in time to make this holiday season your most creative one yet!

Happy Crafting!
<3 Love,
Myria

Thursday, November 12, 2015

Business Collab with L'Amour Baking Company

Hello my sweets!

I'm super excited to announce that I've teamed up to do a business collaboration with L'Amour Baking Company, an adorable bakery here in Los Ranchos that specializes in French Macaroons.
And let me say - they are delicious!!!! <3 <3 <3

They are definitely my favorite bakery in town, although I may be a bit biased because I can walk to it from my house...


I have made them some polymer clay macaroon and cupcake jewelry to sell in their bakery.
Now customers can buy souvenir earrings, charms, and rings to remember their delicious pastries by.

Here is a pair of earrings that replicate their Red Velvet macaroons.

These clay pieces come complete with stainless steel ear hooks, clasps, and L'Amour heart charms.  
These ones are kiwi lime macaroons.

These charms come with lobster clasps so that you can hook them onto your bracelet, necklaces, zippers, keys, and more! 
These are Salted Caramel and Orange Dream macaroons.

The rings are adjustable and nickel free! 

Orange Dream cupcake earrings 

Now let me show you their baked goods <3

Gorgeous Red Velvet and Party Cake macaroons

Vanilla Bean and Just Chocolate macaroons 

My favorites!  Lavender and Pistachio macaroons 

My second favorites!  Salted Caramel and Lemonade macaroons

Chocolate Mint and Pecan Pie macaroons.  
Both are flavors of the month

Cappuccino and Pumpkin Pie macaroons 

Adorable and festive Autumn cupcakes 

In addition to delicious macaroons and cupcakes you can also order pumpkin pies, pecan pies, pumpkin rolls, and dinner rolls for your holiday parties.

Here's a photo of their Pumpkin Rolls.  Nom nom nom! 

Or how about a Salted Caramel Apple Tart? 

I didn't take a photo but they also offer DELICIOUS Quiches.

Now that I've tempted you with jewelry and pastries, I hope you'll make it out to their Thanks For Giving event.  They are collecting a variety of needed goods from November 10th-25th to help our community during the holiday.   Click HERE for a list of items to donate.  

With your donation you will receive 15% off your treats from L'Amour Baking Co!

All donations will benefit Albuquerque Heading Home and Joy Junction

Treat yo-self!
Love,
Myria

Wednesday, October 28, 2015

Dyeing Doilies with Alcohol Ink

Hello my lovelies,

I've been on this alcohol ink kick lately, as you've probably guessed based on my previous posts DIY Alcohol Ink and DIY Shimmer Spritz Experiment.  Well, here's another!

I have been saving various vintage handkerchiefs and doilies that are stained, intending to do something cool with them.  In most cases I can use OxyClean and super hot water to remove any stains, but there are a few that just won't come clean.  Recently I decided to experiment with alcohol inks.

Unfortunately, I didn't take photos of my process so I'll just try to explain what I did.
Basically I just decided what pattern I wanted and which colors I wanted to go where.

I used the Wild Plum and Denim, combined with a hot pastel pink one that I made myself.
The Wild Plum is the darker purple color, the one I made myself is the lighter pink, and the blue parts are the denim ink.

 I started by dabbing the plum ink just inside of the border, a little at a time, allowing it to bleed and spread.
Then I did the denim on the petals.  Last I sprayed the hot pastel pink all over to help facilitate the ink to bleed and move and blend together.  I used the inks again to fill in any gaps.

Next, I did the same thing with this one, dabbing the alcohol ink directly from the bottle onto the doily and allowing it to bleed and blend before I added more.
I allowed the doilies to dry completely before I soaked them in boiling water.

In my final step I boiled some water and poured it into a plastic bowl that I didn't care about.
I did the 1st one first and allowed it to soak, stirring occasionally, until the water had completely cooled.  I then drained and rinsed it in cold water until the water was mostly clear.

Then, I repeated the process, adding this little round doily to the mix.  I realized the 1st time around that I was wasting ink in the heat setting process, and that I could probably be dyeing some more fabric at the same time.  I was right.  This came out so cute!

I just love how these look!  I'm definitely eager to make some more.
I'll be selling them in my booth at Antiques and Things, booth #19.

Hope you enjoyed this post!
Love,
Myria


Thursday, October 22, 2015

DIY Shimmer Spritz Experiment

Hello My Pretties!

I'm pretty excited to show you all how I made these Shimmer Ink Sprays.


I recently went to Tuesday Morning and bought a bottle of Tattered Angels Glimmer Mist.  It was the only color they had, otherwise I would have bought more.

Only $2.49!  I got it home, used it, loved it!  Wanted more. 

 Then I got the bright idea to try to make my own.  I've had these Johne Headlights sprays for YEARS. I bought them at the International Beauty Show in New York for something like $1 or $2 per bottle.  I never used them because when you spray the glitter, as soon as the liquid dries the glitter falls off.  
Lame.
I saved them because I just knew that I would be able to use them for something crafty one day.
(in this photo I had already emptied out 1/2 of the liquid from most of the bottles)

I read the ingredients and it seemed pretty straight forward.  It is mostly made of botanicals, glitter, and alcohol.

I decided the best way to go about it would be to empty out 1/2 of the liquid

and add Mod Podge

I wasn't exactly sure how much to add so I started with a little bit, then spritzed it. 
 If the glitter didn't stick when it dried then I added more Mod Podge.

Here is the before photo of my sample tag.  
Keep in mind that I have inked the edges of this tag with a ColorBox Paintbox ink pad to match the stamp.

Here is the after photo.  Pretty!

I later got the idea to add some homemade Alcohol Inks to the mix.
These two turned out the best!

Up close photo of the Tattered Angels Glimmer Mist...pretty!

 Photo of my pink glitter with pink alcohol ink added.

Photo of my blue glitter with pink and blue alcohol ink added.
(pink + blue = purple)

Verdict:  it works!
To recap, I don't have an actual recipe but the ingredients used are alcohol, glitter, mod podge, and Alcohol Inks - in that order.  If I had to, I'd say 60% Alcohol, 15% glitter, 15% mod podge, and 10% alcohol ink.

Keep in mind that $2.49 is not much to pay at all!  And if you can find the Glimmer Mists that cheap then buy them!  Don't bother making your own.  However, in a pinch if you really need some for a late night project then you can easily make your own.

Hope you enjoyed my post,
Love,
Myria

Thursday, July 30, 2015

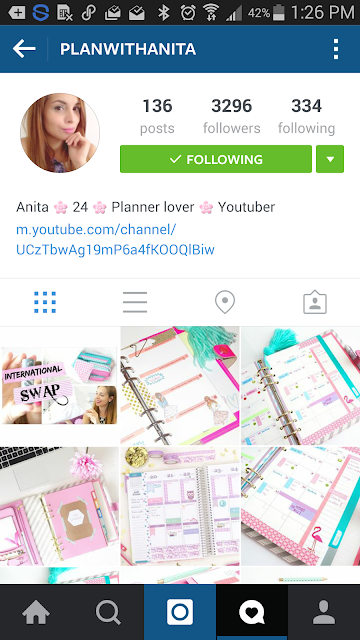
My Favorite Instagram #PlannerAddicts

Hi all,

I was perusing Instagram today, basking in the beauty and awesomeness that the accounts that I follow share.  I felt so much admiration for these ladies that I follow that I thought I would share them with you.  Keep in mind that this post is dedicated to my fellow planner addicts only.  I also follow many many amazing needle felters, jewelers, photographers, makeup artists, and more.

These ladies are seriously super cool.


Let me know what you think!  Also, please feel free to share your favorite Instagram #planneraddicts in my comments.

Love,
Myria