Hi all,
My friend gave me this cute miniatures display thingie that she found second hand and I immediately wanted to jazz it up
First I picked my paper. I chose some paper that I bought from my Stampin' Up rep.
I picked this paper because it has the pastel pinks, blues, and yellows that I'm attracted to but it also had a nice bright red and coral which complemented the red background of the shelf. It also had little images of antique household items. I felt this theme matched the curio cabinet.
I selected a few coordinating embellishments.
Then I got started in my vision. I handmade the bunting banner out of the coordinating paper.
I cut the paper to the size of each box and added my embellishments. I left room for my little miniatures that I would be adding.
I added some little curios that I had sitting around my craft room but there is still room for more tiny finds.
In a few cases I took an image and measured it so that parts of the images could be in 4 to 6 boxes.
Until next time!
- Posted using BlogPress from my iPhone
My blog for arts and crafts interests. On this site I will be including my favorite project ideas, craft obsessions, kawaii finds, art supply reviews, craft materials, supply stores/outlets, interviews of artists and crafts people, thrift shopping finds, my projects and completed works, and more! I'm a mobile blogger ^.^
Tuesday, July 16, 2013
Free Vintage Images ~ Lullaby Sheet Music
The Old Design Shop Vintage Image Treasury
Here are three aged and shabby pages of sheet music for a Lullaby by Margaret Tuggle. This Lullaby was published in the April 1895 issue of The Delineator magazine.
Click on images to enlarge.
Original Article: http://olddesignshop.com/2013/07/free-vintage-images-lullaby-sheet-music/
Friday, July 12, 2013
DIY Paper Feathers
I founds this neat tutorial on one of my favorite blogs - Red Rock Rose. Check it out!
Original Article: http://sneakpeek.blogspot.com/2012/01/paper-feathers-great-decorating-idea.html
Tuesday, July 9, 2013
Digital Scrapbooking Elements: Printable Frame for Graduation
From the Antique Images blog:
I fell in love with this antique image and decided to share it with you - I hope you enjoy!
Original Article: http://antiqueimages.blogspot.com/2013/07/digital-scrapbooking-elements-printable.html
Thanks!
Myria
Monday, July 8, 2013
Vintage Thrift Shop Finds: Jewelry and Jewelry Box
Hi all,
This is another email in a series that I'm working on - Thrift Shop Finds!
I purchased a mostly nice jewelry box at the Goodwill here in Albuquerque for $7.00...more than I usually like to pay but it was a good size and the inside was in good condition.
Using Mod Podge - I decided to decorate the top with some Melody Ross paper and lace ribbons that I had.
I messed up a little when I was trying to smooth out some air bubbles. Maybe I'll put a speech bubble there...
I tried to preserve the gold trimmed border on the top but i cut it a little close on the left side.
The last things I used were a wide polka dotted ribbon in red and white, with 3 types of coordinating lace.
The inside is filled with vintage jewelry goodies that I haven't decided what I will do with yet...
Stay tuned!
- Posted using BlogPress from my iPhone
Sunday, July 7, 2013
Texture Paste Technique {with Gabrielle Pollacco}
From the Webster's Home Blog
I ran across this post on how to create homemade texture paste and fell in love with her example!
Swoon!!!!!
Designer Gabrielle Pollacco is sharing her very own homemade texture past recipe!!
Here's her special recipe!
Use an old credit card to apply your texture paste to your mask, holding the card at an angle and skimming it over the mask onto the paper.
Here is what Gabi's texture design looks like on her layout.
Tip: The paste dries fairly quickly but you can speed up the drying process and keep the paper from buckling by drying it with a blow dryer on a low setting.
Now...a look at her finished product!
{BREATHTAKING!}
Original Article: http://websterspages.typepad.com/webstershome/2013/06/texture-paste-technique-with-gabrielle-pollacco.html
Saturday, July 6, 2013
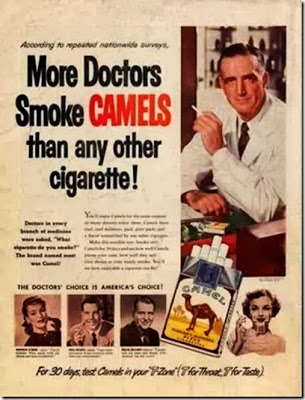
Ads You'll Never See Again! (Awesome Ephemera)
I was emailed this awesome collection of crazy and sexist ads from the mid-century and all I can think of is using them to make stuff! Offensive? Kinda... Hilarious? Definitely.
Enjoy!Myria
Subscribe to:
Posts (Atom)