Pages

Showing posts with label Infants and Children. Show all posts

Saturday, September 20, 2014

DIY - Toddler Sewing Cards

Hi My Beauties,

Following with the toddler antics theme, this week I will be discussing one way to keep your wees busy. 

When I was little I used to have a set of sewing cards.  They had cute animals on them and were about 5" x 7".  They were kind of like a perforated connect the dots, using yarn with tape on the end (like a shoelace) to "sew" the image.  My mom showed me how to use them and from then on I was hooked to sewing!

Recently, one day when I was trying to work in my craft room, and my daughter was being especially needy, so I decided to try to make a set for my her.  I didn't have all of the materials to make them like the ones that I used to have, so I just used some pretty 4" x 6" card stock and a stamp.

Note:  On the burgundy card I tried using a mini heart punch but realized 6 punches in that it wasn't going to work because it wouldn't reach!  Lesson learned.


First I picked my paper using the 4" x 6" Mariposa matstack.  I happened to have some ornate butterfly and dragonfly stamps to embellish it with.

Next, I used a tri-color stamp pad to stamp the butterfly.

I put the stamp face up and put the ink where I wanted it on the stamp.  I used a fading technique that I think came out pretty cool. 

I got my punch tool and foam mat.

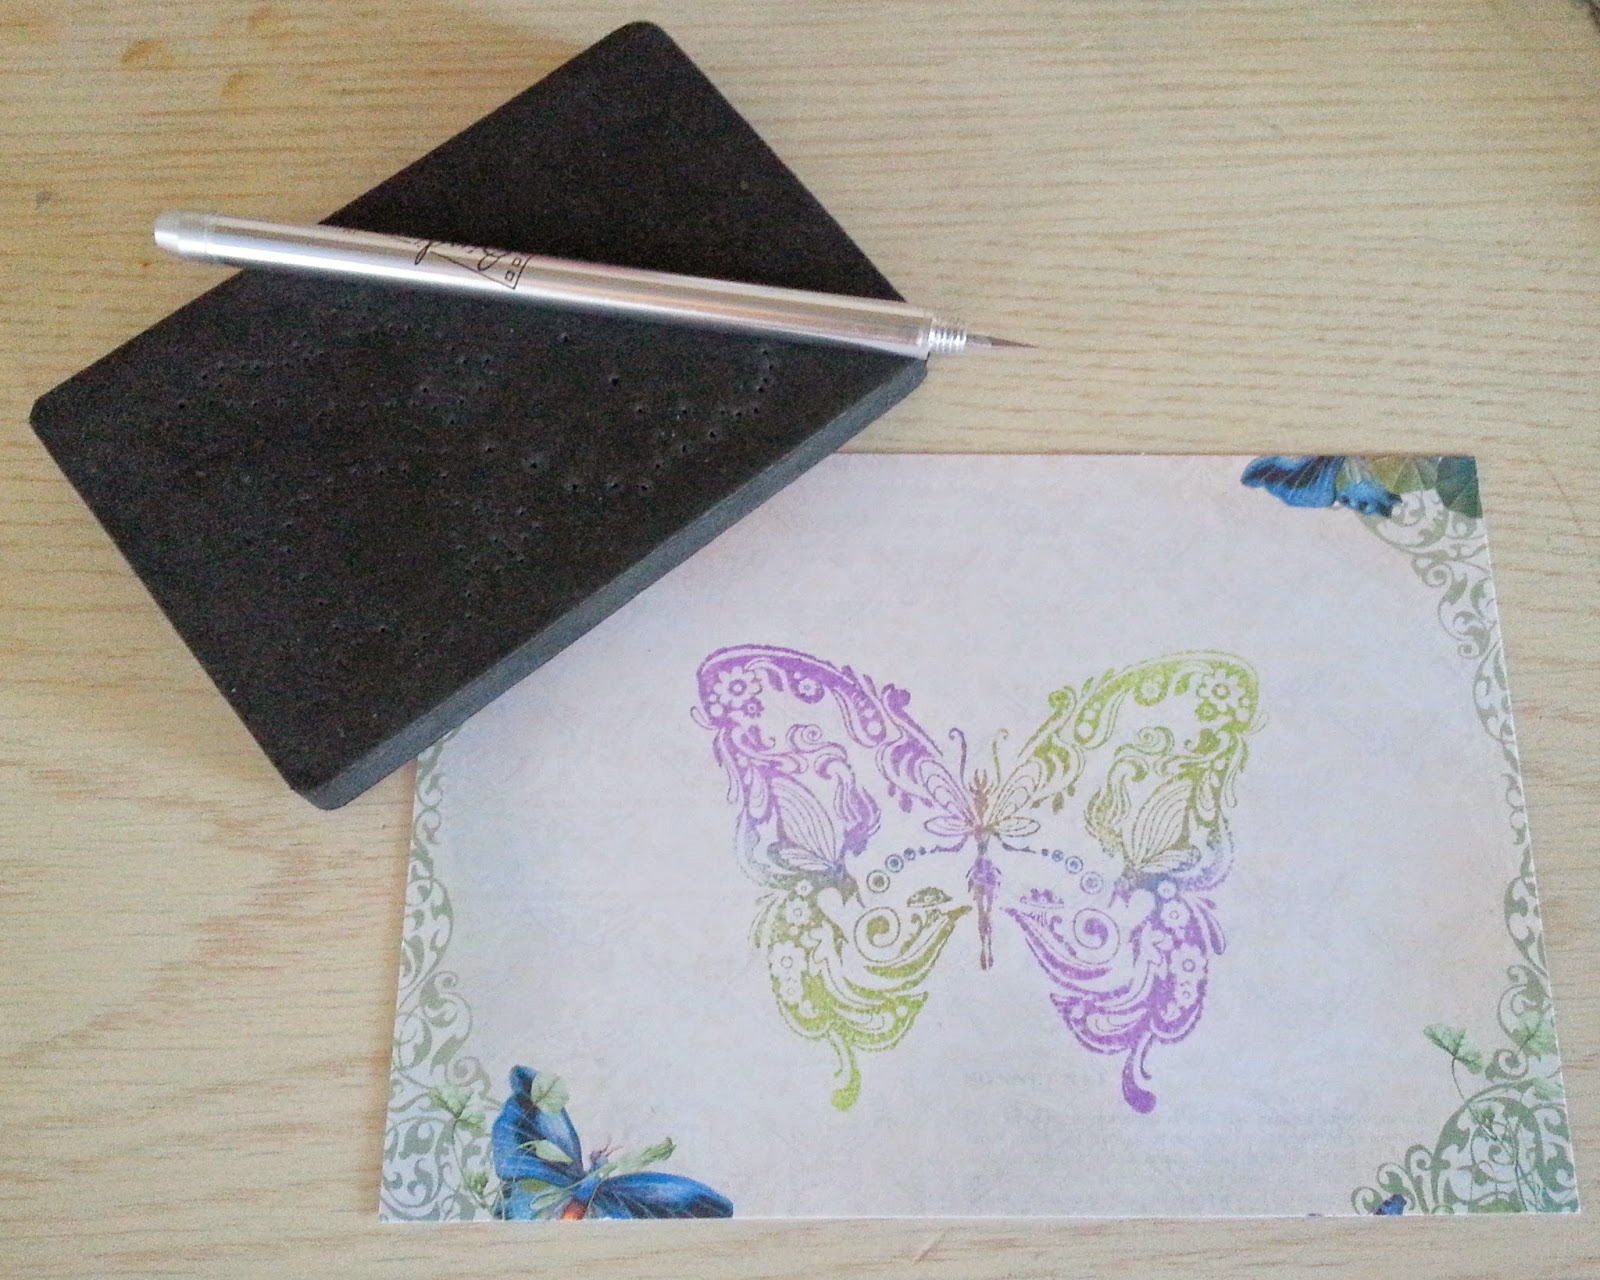
I used a ruler to measure equal intervals between punches - approximately 1/4" between holes.


After this I took some wire cutters and an old embroidery needle.  I cut the tip off and filed it a bit so she won't poke her eye out when she tries to use it.  It could still be dangerous in little hands so be sure to emphasize to your littles that they need to be very careful!

The last step is to tie the thread onto the "first hole" of the card - or whatever you designate as the first hole.  I should have used embroidery thread, but you get the idea.

Needless to say, this kept her busy for a couple of hours while I worked.  Mission accomplished!

Rest assured that if I ever make an "actual" set of these I will post it for you all.
Love,
Myria

Thursday, August 28, 2014

Tour of the Woodruff-Fontaine Victorian Mansion - Part 2

Hello Readers,

I'm sure you are all waiting with baited breath for Part 2 of my Victorian mansion tour, right?  Right!
In last week's post I introduced you to the Woodruff-Fontaine House Mansion however, I left out one room - the nursery. 


A cute little child's sized chair with foot stool.


This room was my favorite display by far! 
I especially loved the life sized mannequins of little girls dressed up in period clothing. 
And the toys...oh the toys...absolutely awesome!!!  
How cute is the wall paper?

Well folks, that concludes the tour. 
Thank you for reading!
Love,
Myria <3

Wednesday, November 2, 2011

Charity Raffle

Hello Friends, Family, and Customers,

As the holiday season approaches, a group of mommy bloggers are organizing a "Spread The Warmth" social media campaign, to help raise awareness and funds for Embrace. EMBRACE is a social enterprise saving the lives of vulnerable infants in developing countries, through an innovative, low cost infant warmer that costs less than 1% of a traditional incubator.

The "Spread The Warmth" raffle will run from Oct 31st to Nov 13th, and I have agreed to participate by donating my "Snowflake Doily" necklace to be raffled off.

I am encouraging you to enter in the charity giveaway by donating $10 towards Embrace. Each additional $5 donation after that will equal one more entry to participate in the raffle of the prizes.

Here is the link to the Charity Raffle.
http://www.familylifeinlv.com/2011/10/spreadthewarmth-charity-raffle.html

Additional donations have also been received and are as follows: 
Spread The Warmth Scentsy Party being hosted by Sally from Exploits of a Military Mama. She is running a party during our event (Oct 30th -Nov 12th) and is donating 100% of her profits to EmbraceGlobal.org for any products sold during that time. Simply go to her site https://mrstrophywife.scentsy.us/Home*, underneath her information there will be a section called My Open Parties. Make sure you buy from "Spread The Warmth party to ensure your purchase will benefit EmbraceGlobal.org.

Good luck to those of you who participate in this raffle. 
Everyone please share this blog post!

Thursday, February 17, 2011

DIY Handmade Cloth Diapers

I recently had a baby girl named Azalea Luz. She is now 3 1/2 months old. While I was pregnant with her I ran across these new fitted cloth diapers. I remember playing with my baby doll as a child and putting my old cloth diapers on her...folding them just right and trying to pin them so they stay on tight. I can't imagine having to do this on a squirming baby! I immediately fell in love with them but on one of the online shops they actually sell them for over $50 EACH! I almost choked!

After some more research I found this tutorial for making your own fitted cloth diapers.  Click HERE to view this tutorial.


I really like this tutorial because you can incorporate recycled fabric to save money but you can also customize the fabric on the outside using any color or print your heart desires!

However, if you don't know how to sew, or don't have the time, you can purchase some really cute, inexpensive, and practical ones on Etsy.
Here are a few of my favorite designs:

Re-usable Diaper - No Diaper Cover Needed!

Fitted Diapers (no image available at this time)

Diaper Covers

All three of these Etsy Shops are really reasonably priced with a variety of sizes and prints.  I <3 these!