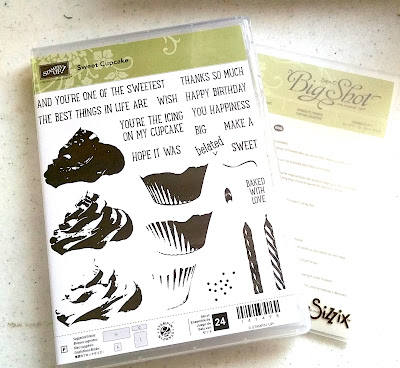
In my last post I went through my favorite items in the latest Stampin Up Catalog and one of my favorites was the Sweet Cupcake Bundle.
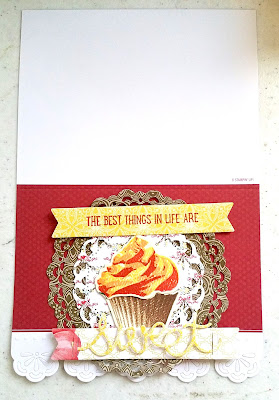
In this post I will show you how I made this lovely card:
I used some retired Stampin Up paper and cards that I had on hand, but you can use literally ANY coordinating paper set for this project.
I first started with my stamp and dies set. You will also need a Big Shot Machine
I also decided to use these pretty (retired) Spellbinders Nestabilities Majestic Circles, but you can also use these Layering Circle Framelits Dies instead.
I've selected these 3 colors for the frosting part of the cupcake: Summer Sun (#1), Archival Brilliance Pearlescent Orange (#2), and Watermelon Wonder (#3).
The idea is to use the lightest color on the stamp that covers the most area 1st, medium goes 2nd, and darkest goes 3rd.
I've selected these 3 colors for the cup part of the cupcake: Creamy Caramel (#1), Tip Top Taupe (#2), and Close To Cocoa (#3)
I will also be using my Misti Stamping Tool to help create perfect stamped images every time, and to help line up the stamps properly
Here's a shot of me using my Misti Stamping Tool with the 3rd whipped cream stamp.
And here's the finished whipped cream stamped image
Next I took my image over to my Big Shot Machine to cut the whipped cream out using the corresponding whipped cream die
After that I started stamping the cup part of the cupcake. Here is what it looks like after the 1st, lightest ink is stamped
Here's a photo of the 2nd, medium colored ink
And here's what it looks like after the 3rd, darkest ink
I took it over to the Big Shot Machine to cut it out using the corresponding die
Then I decided to use the Sweet die and the banner die that is included in this set.
I cut out 2 banners and stamped the darker one with the sentiment "The Best Things In Life Are"
The banner die has little slits which I assumed are for the die cut words to be inserted in. My Big Shot Machine machine didn't cut the slits so I took some scissors to the lighter colored banner that I had cut out.
Next I cut out 2 nesting circles, using different prints of coordinating paper.
Here's a photo of the smaller circle.
Here is what it looks like before I adhere everything.
I ran out of the card stock that I used when making the initial card so I used this card stock instead...for a different look.
Then I decided to flip over the larger circle, because the print on the other side was really pretty...
I couldn't decide which one to use!!!!
So I decided to put it up for a vote on Facebook
Here's a shot of the inside of the card.
I used Tip Top Taupe and Watermelon Wonder.
The sentiment says "The Best Things In Life Are Sweet,
And You're One of the Sweetest. Happy Birthday"
Here's a photo of the finished product. "A" won!
Thanks for reading!!! I'm really looking forward to getting another tripod so I can just film a YouTube video or Periscope (@belovedbijou) this sort of thing... :-/
<3 Myria


